

Documentation Index
Fetch the complete documentation index at: https://wb-21fd5541-docs-2661.mintlify.app/llms.txt
Use this file to discover all available pages before exploring further.
This feature requires a Pro or Enterprise plan.
Looking for companion tutorials for automations?
Requirements
When creating automations:- A team admin can create and manage automations for the team’s projects, as well as components of their automations, such as webhooks, secrets, and Slack integrations. Refer to Team settings.
- To create a registry automation, you must have access to the registry. Refer to Configure Registry access.
- To create a Slack automation, you must have permission to post to the Slack instance and channel you select.
Create an automation
You can create an automation from the project or registry’s Automations tab, or directly from a line plot panel in the workspace.Create from the Automations tab
At a high level, to create an automation from the Automations tab, follow these steps:- If necessary, create a W&B secret for each sensitive string required by the automation, such as an access token, password, or SSH key. Secrets let you reuse sensitive strings safely and keep them out of automation configurations. Define secrets in your Team Settings. Webhook automations most commonly use secrets.
- Configure team-level webhook or Slack integrations to authorize W&B to post to Slack or run the webhook on your behalf. Multiple automations can use a single webhook or Slack integration. Define these actions in your Team Settings.
- In the project or registry, create the automation, which specifies the event to watch for and the action to take (such as posting to Slack or running a webhook). When you create a webhook automation, you configure the payload it sends.
Create a run metric automation from a workspace panel
From a line plot in the workspace, you can also create a run metric automation for the metric it shows:-
Hover over the panel, then click the bell icon at the top of the panel.
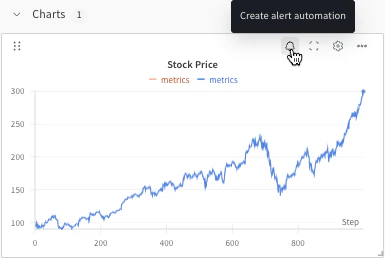
- Configure the automation using the basic or advanced configuration controls. For example, apply a run filter to limit the scope of the automation, or configure an absolute threshold.
View and manage automations
View and manage automations from a project or registry’s Automations tab:- To view an automation’s details, click its name.
- To view an automation’s execution history (which actions ran and whether they succeeded), click its name and select the History tab. For more information, see View an automation’s history.
- To edit an automation, click its action () menu, then click Edit automation.
- To delete an automation, click its action () menu, then click Delete automation.